Install Java Development Kit (JDK)
In this section, we will see step by step guidelines to install Java on your machine. Please refer following steps.
In this section, we will see step by step guidelines to install Java on your machine. Please refer following steps.
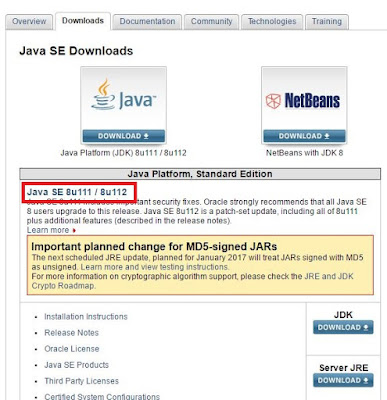
1) Go to Java SE download site and Click on Java Platform (JDK) latest Java SE release.
2) Download latest java JDK for your version(32 or 64 bit) of java for Windows
3) Once the download is complete, run the installer to install JDK. Click Next
4) Once installation is completed click on Close
5) Set Environment Variable as follows
"PATH = <JDK installation directory>\bin;%PATH%"
If the latest version on Java website is 1.8.0_65, your class path will be
C:\Program Files\Java\jdk1.8.0_65\bin;%PATH%
C:\Program Files\Java\jdk1.8.0_65\bin;%PATH%
6) Set Environment Variable
"CLASSPATH = <JDK installation directory>\lib\tools.jar;"
For Java 1.8
CLASSPATH = C:\Program Files\Java\jdk1.8.0_31\lib\tools.jar;
7) Restart your PC. Go to command prompt and type javac
If you see a screen like below' Java is installed successfully.
Install Eclipse
In this section, we will see step by step guidelines to install Eclipse on your machine. Please refer following steps.
Step 1:
- Download Eclipse from https://eclipse.org/downloads/.
- Choose "Eclipse IDE for Java Developers" (32-bit or 64-bit)
- To install Eclipse, simply unzip the downloaded file into a directory of your choice (e.g., "c:\Eclipse").
- There is no need to run any installer.
- When you want to uninstall eclipse, you can simply delete the entire Eclipse directory
Writing your First Java Program in Eclipse
Step 1:
- Launch Eclipse
- Start Eclipse by running "eclipse.exe" in the Eclipse installed directory.
- Choose an appropriate directory for your workspace (i.e., where you would like to save your projects).
- If the "Welcome" screen shows up, close it by clicking the "close" button.
Step 2:
- Create a new Java Project
- For each Java application, you need to create a project to keep all the source files, classes and relevant resources.
- To create a new Java project: Choose "File" menu ⇒ "New" ⇒ "Java project".
- The "New Java Project" dialog pops up.
- In the "Project name" field, enter "FirstProject".
- Click "Finish".
Step 3: Write a Hello-world Java Program
- In the "Package Explorer" (left panel) ⇒ Right-click on "FirstProject" (or use the "File" menu) ⇒ New ⇒ Class.
- The "New Java Class" dialog pops up.
- In "Name" field, enter "Hello".
- Check "public static void main(String[] args)" box.
- Click "Finish".
- The source file "Hello.java" opens on the editor panel. Enter the following codes:
public static void main(String[] args) {
System.out.println("Hello, world!");
}
}
Step 4: Compile & Execute the Java Program
- To run the program, from the "Run" menu ⇒ Choose "Run As" ⇒ "Java Application".
- The output "Hello, world!" appears on the "Console" panel.
Next -->


It is very informative and useful.Thanks.
ReplyDeleteWritten exceptionally well, very detailed. Never been to any site/blog where the content for installation is in such detail.
ReplyDelete