- Selenium WebDriver allows us to write the automation scripts for web applications and execute them in various browsers.
- In some test scenarios, you might need to verify the functionality of windows but selenium doesn't support windows applications.
- In this section, we will discuss about how to handle windows application through selenium script. We will take an example of file upload where a windows file upload dialog opens to browse and select files and we will interact on it using Selenium WebDriver.
- In order to interact with windows dialog we need to use the AutoIt tool. AutoIt is scripting language which is used to automate windows dialog. It uses a combination of mouse movement, keystrokes and window control manipulation to automate a task which is not possible by selenium webdriver.
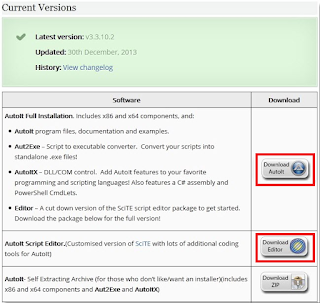
- The very first step is download and install the AutoIt and AutoIT Script editor. To download the AutoIt use the following URL https://www.autoitscript.com/site/autoit/downloads/
-
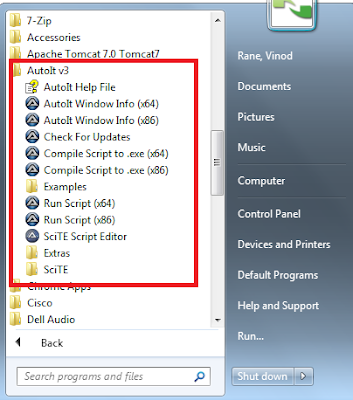
- After successful installation of AutoIt tool, go to your program menu and look at the AutoIt folder, your folder will look like the image below.
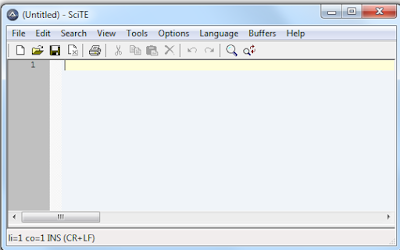
- Click on SciTE script editor to open up AutoIT script editor. This will look like following.
- Now Open AutoIT Window Info (x64) as shown in below screen.
- Now open file up-loader window by clicking on 'Choose File' which is windows activity. We will use this link in this example.
- Drag the finder tool on the " File Name" box element of file uploader window to find the basic attributes info as shown in the below screen with the arrow.
- We will get the value of attributes i.e. title='Open', class='Edit' and instance='1' as shown below. These values are used in writing AutoIT script.
- Start writing script in AutoIT script editor which we have opened in step 3. There are lots of method available in autoIT, but right now we will focus on the following methods which are required for file upload.
- The script will be look like below.
1
2
3
4
5
6
7
WinWaitActive("Open","")
Sleep(500)
ControlFocus("Open","","Edit1")
Sleep(500)
ControlSetText("Open","","Edit1","C:\tmp\test.txt")
Sleep(500)
ControlClick("Open","","Button1")
API description:-
ControlFocus("title","text",controlID) //Sets input focus to a given control on a window.
ControlSetText("title","text",controlID) // Sets text of a control.
ControlClick(" title","text",controlID) //Sends a mouse click command to a given control.
Save the script as FileUpload.au3 and click on Tool->Compile in script editor. 'FileUpload exe' file generated after compilation. Now we will execute this file using Selenium WebDriver.
AutoIT Upload file in Selenium Webdriver
Save the script as FileUpload.au3 and click on Tool->Compile in script editor. 'FileUpload exe' file generated after compilation. Now we will execute this file using Selenium WebDriver.
AutoIT Upload file in Selenium Webdriver
- Create selenium script in eclipse
- We will use Runtime class which allows the script to interface with the environment in which the script is running.
- getRuntime() get the current runtime associated with this process.
- exec() methods execute the AutoIT script (FileUpload.exe)
- The code will looks like below
Please find the complete script to upload a file using selenium webdriver.
1 2 3 4 5 6 7 8 9 10 11 12 13 14 15 16 17 18 19 | import java.io.IOException; import org.openqa.selenium.By; import org.openqa.selenium.WebDriver; import org.openqa.selenium.chrome.ChromeDriver; public class FileUpload { public static void main(String[] args) throws IOException{ System.setProperty("webdriver.chrome.driver","C:\\drivers\\chromedriver.exe"); WebDriver driver = new ChromeDriver(); driver.get("https://selenium-vinod.blogspot.in/p/task1.html"); driver.findElement(By.id("FileUpload")).click(); // below line execute the AutoIT script . Runtime.getRuntime().exec("C:\\Users\\vinod\\Desktop\\FileUpload.exe"); driver.close(); } } |


No comments:
Post a Comment